How to create a button to sort columns in Google Sheets
Written by Akshay Chavan on #arccoder Blog
30 Oct 2016Today we will see how to create a button to sort more than one columns according to a single column in google sheets.
You can do this, even if you have no programming background.
First make a sheet and add some data in it as shown below. Starting from the very first cell in the top left corner, cell A1.
You may also copy this data and paste it in the cell A1.
| Data 1 | Data 2 | Data 3 | |||
|---|---|---|---|---|---|
| H | 2016-09-27 | E | 2016-08-30 | H | 2016-10-01 |
| E | 2016-10-04 | D | 2016-09-01 | B | 2016-10-07 |
| F | 2016-10-14 | B | 2016-09-05 | D | 2016-10-09 |
| C | 2016-10-17 | F | 2016-09-08 | G | 2016-10-09 |
| A | 2016-10-25 | A | 2016-09-20 | C | 2016-10-15 |
| G | 2016-10-29 | C | 2016-09-22 | F | 2016-10-18 |
| D | 2016-11-03 | G | 2016-09-29 | A | 2016-10-23 |
| B | 2016-11-24 | H | 2016-10-04 | E | 2016-11-04 |
Next open the google apps script editor.
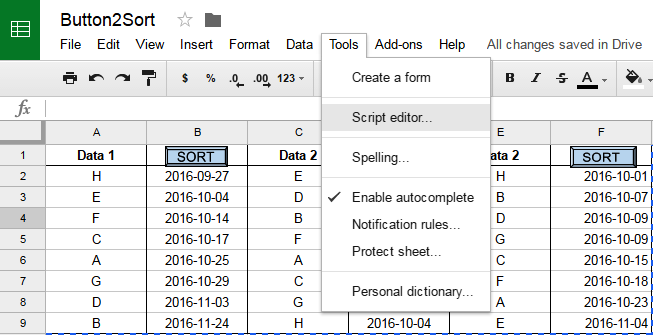
Click on Tools -> Script editor. You should see a code.gs file open for editing. You may also name the file as per your preference in the top left corner.
Paste the following code in the Code.gs file.
function Data1() {
  SpreadsheetApp.getActiveSheet().getRange(2,1,8,2).sort( {column: 2,ascending: true} );
}

function Data2() {
  SpreadsheetApp.getActiveSheet().getRange(2,3,7,2).sort( {column: 4,ascending: true} );
}

function Data3() {
  SpreadsheetApp.getActiveSheet().getRange(2,5,8,2).sort( {column: 6,ascending: true} );
}
Code Explanation
function functionName() {

}
Creating functions is a way of encase commands that you want to execute into a single unit and giving it a name.
Naming the function is a way to identify the set of commands and tell the computer what you want to execute when a button is pressed.
Now lets see in parts what the statement inside the function means.
The way we are creating functions to accomplish the sort of the columns. Google has provided such functions and the functions that can be used in google sheets are put together in the SpreadsheetApp class. For now just understand the function encases command and class encases functions.
Next for the ‘SpreadsheetApp’ we would like to pick the active sheet .getActiveSheet(). An active sheet is usually the sheet that is open. So if you have a file with more than one sheet, this function will fetch you the sheet that you are looking at.
.getRange(‘A2:B9’) fetches you data from a particular range of cells on the sheets. The link to the documentation provides a good explanation on how to use the function.
Here we have the A1:B9 which simply indicated the range from top-left cell A1 to the bottom-right ‘B9` cell.
Now comes the actual sorting part. After we have fetched the data we can sort the data using the .sort function. It takes two arguments the column which need to be sorted and whether to sort in the ascending and descending order.
In {column: 2,ascending: true}, the number 2 besides the column tells the sort function to sort the data
within the given range according to the second column. The columns are numbered serially from left to right starting with one.
An important thing to remember is that column number is not relative .
Therefore you can see in the sort function used in function Data2 the column number is 4 and not 2.
Even though you want to sort according to the data in the second column D within the range the serial number for column D is 4.
The second argument is self explanatory. If you want to sort data in ascending order set it to true or completely skip
the argument as the default sorting order is ascending. For descending sort set it to false.
Here you code snippet above you can see we have made three different functions as I would like to show you how to make different buttons to sort different set of columns.
Save the script.
Lets make the button
Now that we have the code in place lets make the button.
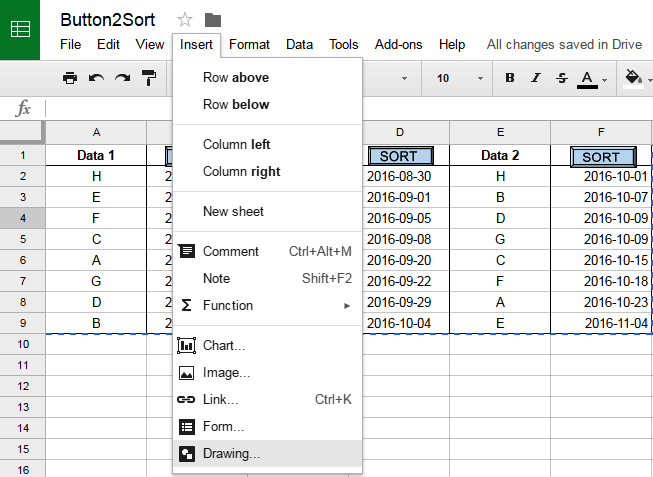
Click on Insert -> Drawing. A drawing window will open. Click on Shape -> Shapes -> Bevel.
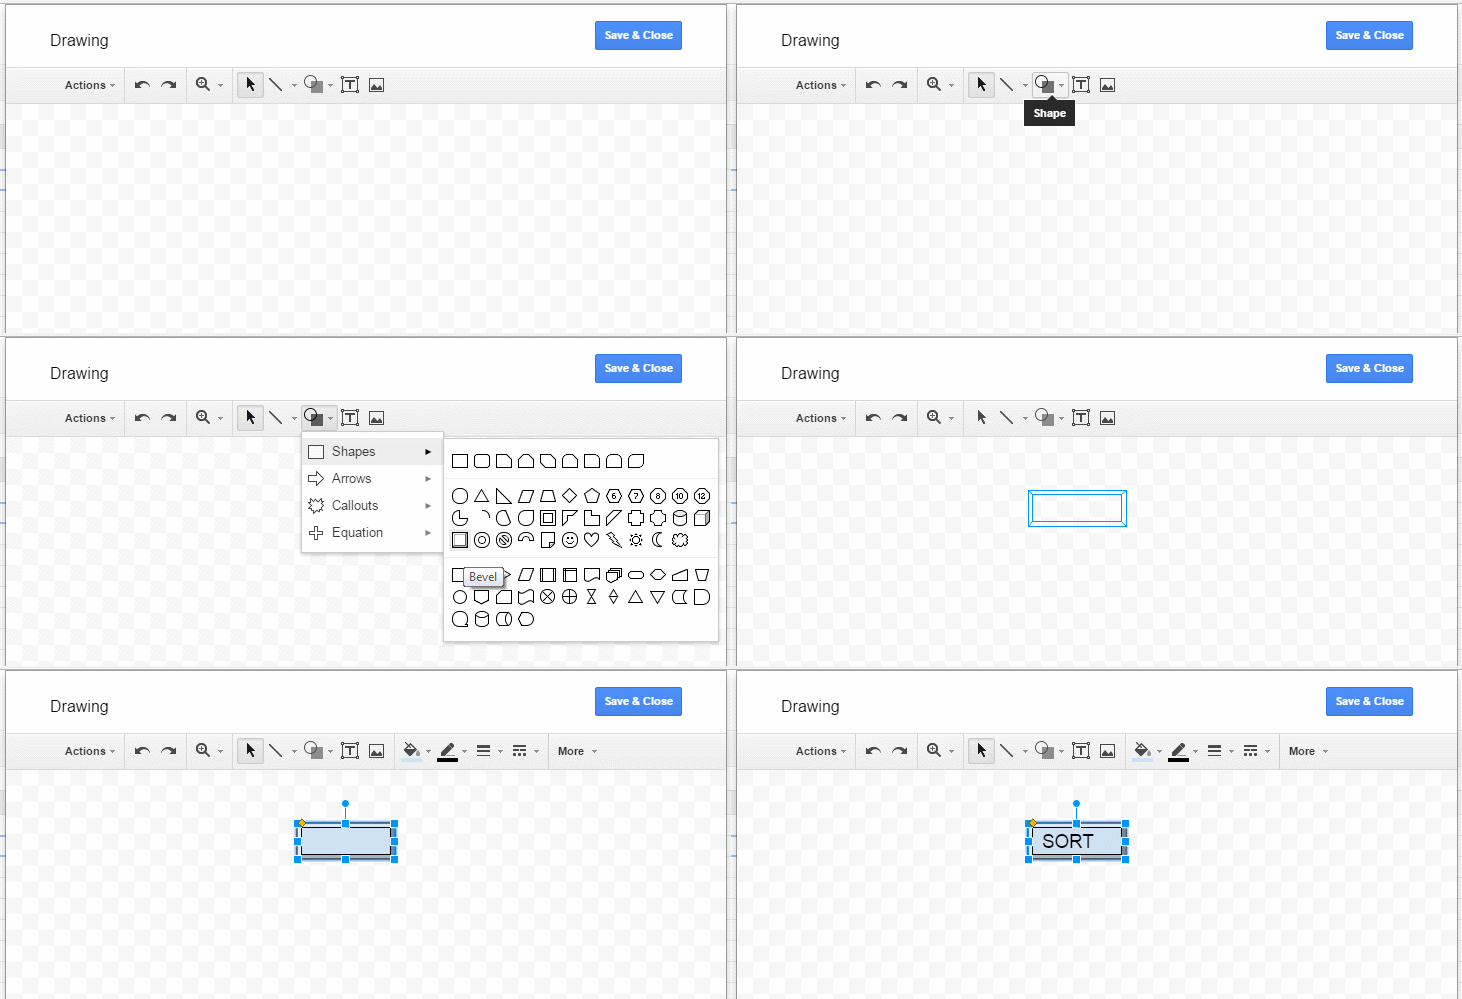
I have selected a bevel shape here but you can select an other shape from the list.
Drag a bevel shape on the drawing canvas. Don’t worry about the size you can change the size once it is inserted in the sheet.
Add a text to the button SORT as we are going to use this button to sort the data. Place the button where ever you want on the page.
All you are left to do is assign a function to the button.
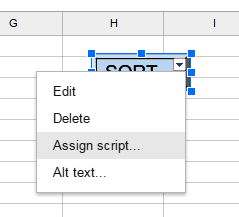
Right click on the button and left click on the drop-down button that you see on the right.
Select Assign script and a dialog box pops up.
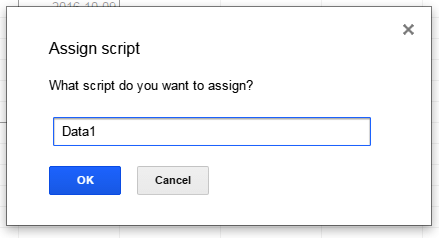
Type in the name of the function that you would like to call on the press of this button and click OK.
You are done. Click the button, if your data is not sorted in the ascending order you see it sort itself.
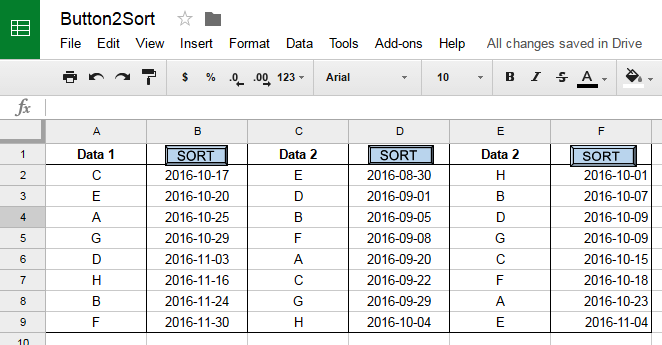
Follow similar steps to setup the other to button. Now every time you change the data (here dates) just click the button and see the data sort itself.
References:
Related Posts
Edge detection explained in 1D : 15 Jan 2017How to sort columns on the fly while editing in Google Sheets : 01 Nov 2016
How to use meanshift function from FastCV : 04 Oct 2016